
Using the Opencart platform for your e-commerce business and want to integrate Khalti as a payment gateway? Download the Opencart Khalti payment gateway plugin from the GitHub resources and follow the installation process.
Download Opencart Khalti Payment Gateway Extension.
1: Go to Extension > Installer in your admin Dashboard
2: Upload the zip file of the extension you have downloaded
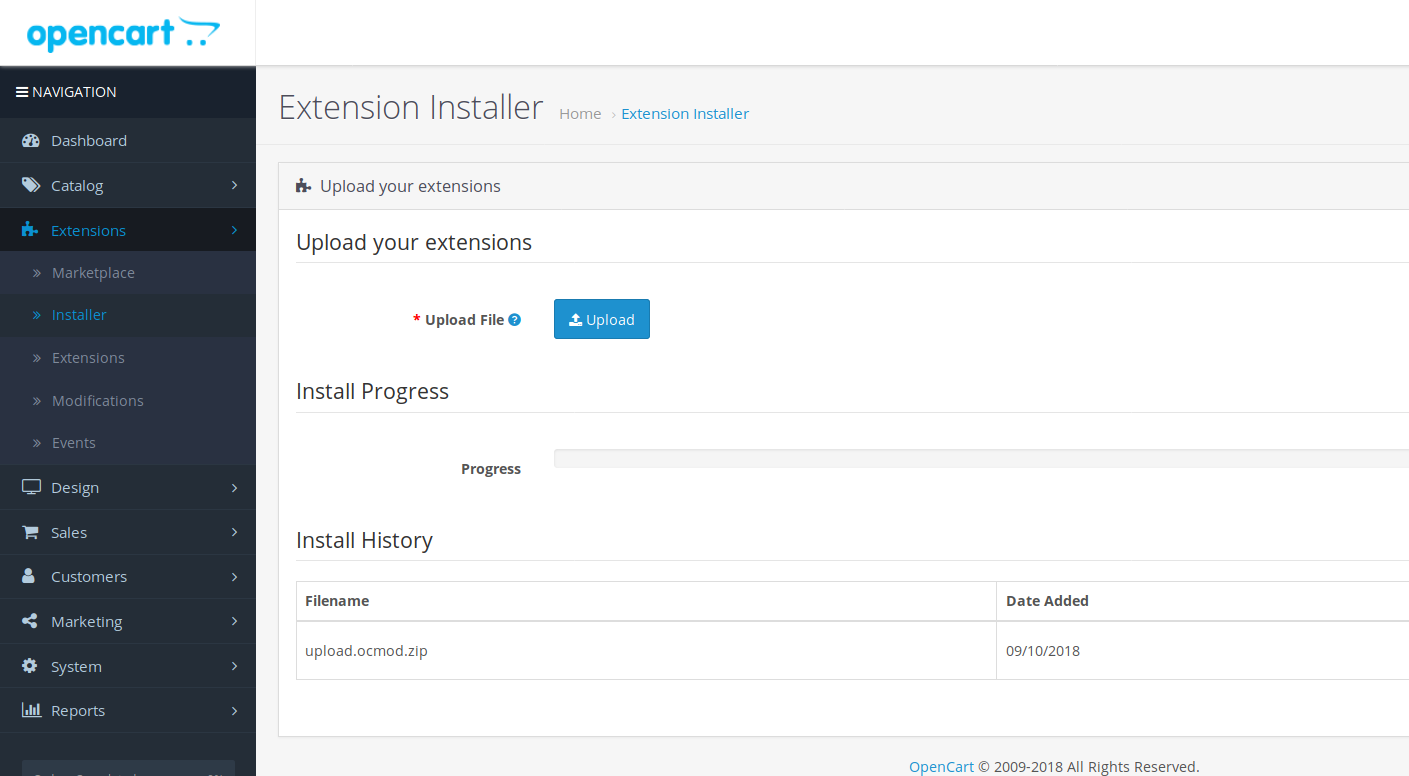
3: Now after successful upload go to Extensions > Extensions
4: Choose the Payment on extension type section you will get a list with Khalti in it.
5: Select to edit button. You will see fields as below.

6: Set Test Mode to Yes and Status to Enabled. Enter your test public key and test secret key in respective fields and save. You can get keys from the Keys section in your merchant dashboard.

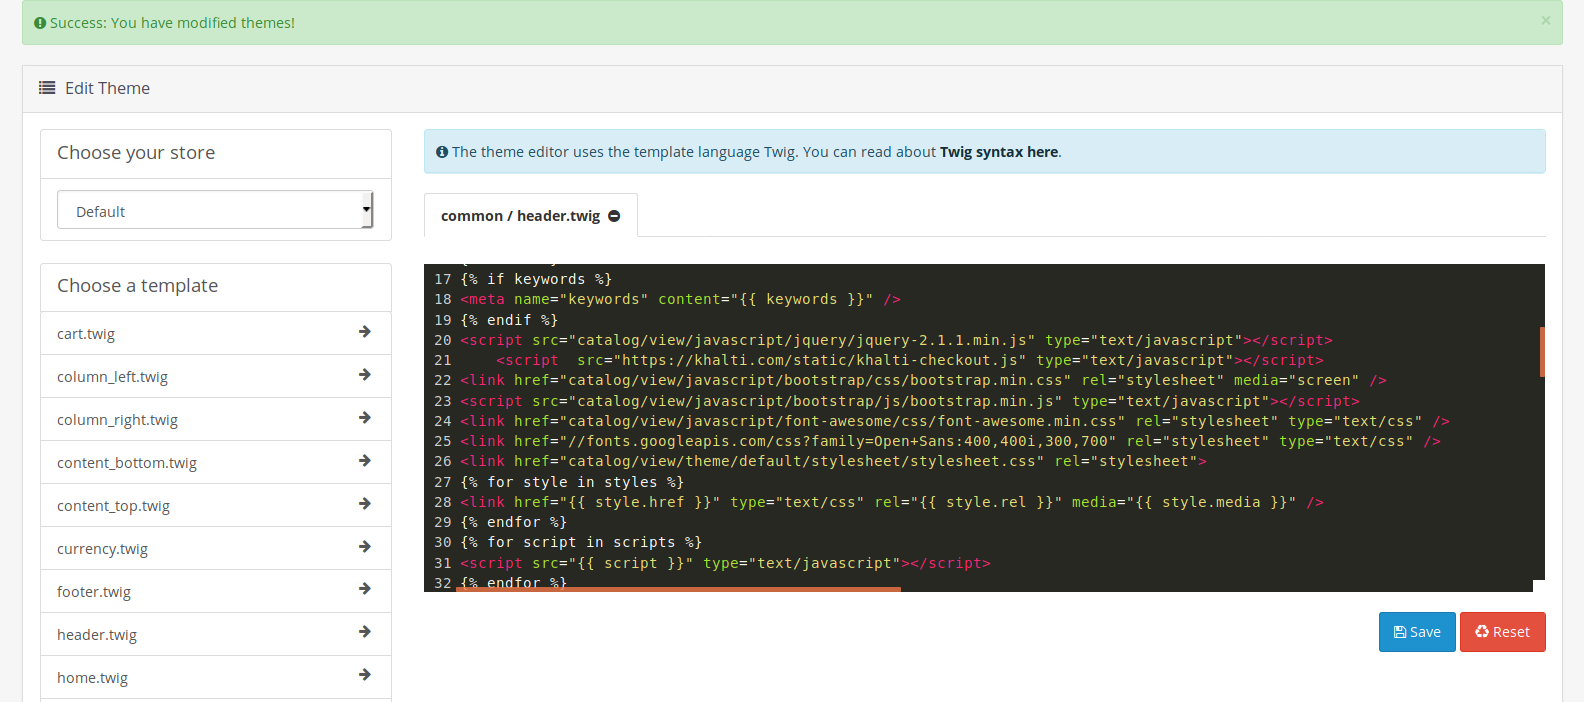
7: After successful upload go to Design > Theme Editor in dashboard side nav
8: Select Common > header.twig from Choose a Template section
<script “https://khalti.com/static/khalti-checkout.js” type=”text/javascript”></script>
9: Add above line in header.twig and save.
Note: You may need to manage the permission of your project folders. If the downloaded zip is not compatible try compressing to zip after you decompress it.
For Manual Installation of Opencart Khalti Payment Gateway:
1: Extract the zip file.
2: Copy all files on the root directory of the project
3: Add script with src “https://khalti.com/static/khalti-checkout.js” on your themes header file which is located on “catalog/view/theme/YOUR_THEME_NAME/common/header.twig”
Step 4: Clear Opencart cache
Testing Opencart Khalti Online Payment Gateway:
1: Before testing set default currency to Nepalese Rupee. (How)
2: Go to your shop and complete a transaction from the Wallet payment type.
Deploying Opencart Khalti Online Payment Gateway:
1: If a test is passed successfully, go to the keys section in your merchant dashboard. You will get your Live keys there.
2: Uncheck the Test Mode and enter your public and secret keys in respective fields
3: Finally save the changes.
Note: Submit your KYC immediately to accept payments of higher values.
Now users can successfully pay at your website using Khalti.
After passing the test, our merchant representative will be notified with an automated email. Even after updating your test keys with your live keys, restrictions are placed on payments. To uplift the restrictions, the two parties must finalize the agreement and commission.
Other Khalti Online Payment Gateway API resources:
Documentation: http://docs.khalti.com
Web SDK: https://docs.khalti.com/checkout/web/
Android SDK: http://docs.khalti.com/checkout/android/
iOS SDK: http://docs.khalti.com/checkout/ios/
Github: github.com/khalti
If you have any confusions and inquiries, you can connect to us in the following ways:
Phone/Whatsapp/Viber: 9801165568/ 9801165577
We are available on Skype for technical support. Skype ID: 9801165568/ 9801165557
Email: developers@khalti.com, merchant@khalti.com